This article, Litara's Quest, was created by Quilafa.
| Start point | |
| Member requirement | |
| Official difficulty | |
| Description | Litara is looking for her long-lost brother, Elif, and ask you to help, you will face the most dangerous monster of the Stronghold of Security, in order to save Elif, are you skilled enough to make it out alive, and save Elif? |
| Length | Medium-Long |
| Requirements |
Recommended:
|
| Items required | Items from the toolbelt are not listed unless they do not work or are not automatically added.
5000 gp |
| Enemies to defeat |
|
Start[]

Talk to Litara in Gunnarsgrunn, next to the entrance of the Stronghold of Security. She will say that she still is looking for her brother, Elif. Ask her to help searching.

Elif is death?
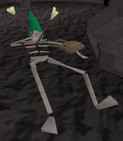
Go down to the Stronghold of Security. Inspect the skeleton of a dead explorer, found on the first floor of the stronghold. Take its book. Talk to Litara and say that its brother is dead... She don't believe it. You must take the skeleton and show it to her. Take the skeleton, 10 ![]() is needed, else you get the message It’s Too heavy! Show the remains to Litara. She will say that that isn't her brother, he wasn't wearing a green hood. She thinks it was a friend, and fellow adventurer of her brother called Wallhelim. You must bury him at the field west of Gunnarsgrunn. Litara will tell you where to bury him, you need a spade after you bury him you get 4000
is needed, else you get the message It’s Too heavy! Show the remains to Litara. She will say that that isn't her brother, he wasn't wearing a green hood. She thinks it was a friend, and fellow adventurer of her brother called Wallhelim. You must bury him at the field west of Gunnarsgrunn. Litara will tell you where to bury him, you need a spade after you bury him you get 4000 ![]() exp, if you don’t want the prayer xp, you can use it on a barbarian, he will do it for you. Now an spirit will appear, talk with him, a ghostspeak amulet is needed! He will say that he is Wallhelim, and that his friend, Elif, is imprisoned by something... You have to defeat it, as well as his minions. Ask him where those minions are. He will say: At the center off each level of the stronghold, you will have to dig...
exp, if you don’t want the prayer xp, you can use it on a barbarian, he will do it for you. Now an spirit will appear, talk with him, a ghostspeak amulet is needed! He will say that he is Wallhelim, and that his friend, Elif, is imprisoned by something... You have to defeat it, as well as his minions. Ask him where those minions are. He will say: At the center off each level of the stronghold, you will have to dig...
The Horsemen[]
Prepare yourself for an battle with several monsters of 75, Don't take to much food with you, because you can only eat food at the first boss, take an spade with you to, and go into the stronghold again.You can use the portals to teleport to the center, if you already claimed the reward of that floor. If you didn't already claim the reward, you must go though the Stronghold, look out for the monsters! Also after you defeated one horsemen, you can better claim the rewards, so you don't need to travel though the dungeon once again.
Note: You must kill the Horsemen in one single trip!
Horseman of War[]
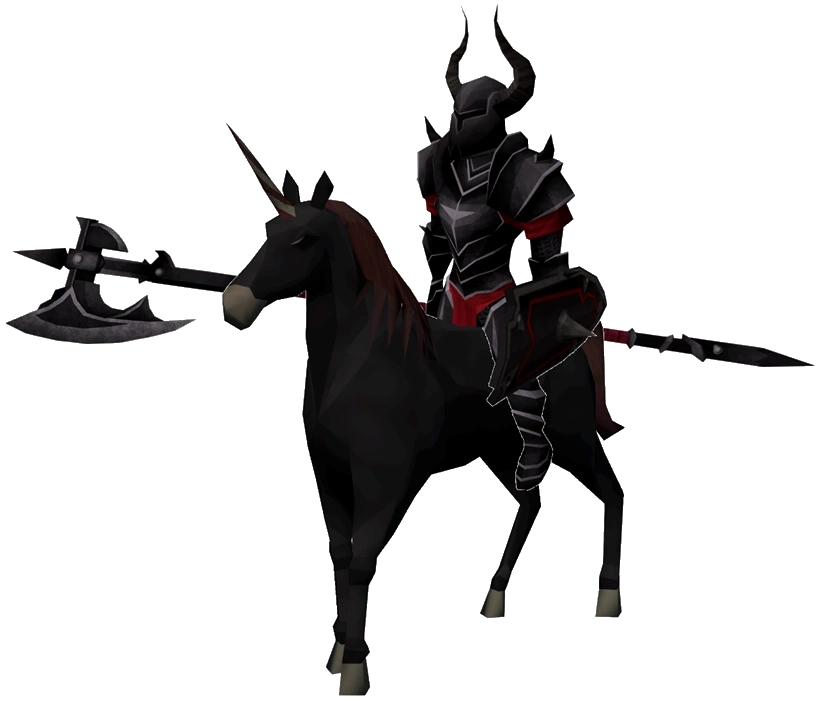

The Horseman of War, are you peaceful enough to defeat it?
You must go first to the center of the first floor, and dig one spot east of the Gift of Peace. A Horseman of War of combat level 75 will appear, it summons minions of combat 30, You don't need to kill the minions just kill the Horseman of War. After you defeated it, take the Shard of War.
Horseman of Famine[]

The Horseman of Famine, can you defeat it without food?
Go down to the second floor. Go to the center of the second floor and dig one spot south of the Grain of Plenty, A Horseman of Famine, of combat level 75, will appear, it has a power that like Ghasts, that turns your food into Rotten food. After you defeated it, take the Shard of Famine.
Horseman of Pestilence[]
Go down to the third floor. Go to the center, and dig one spot north of the Box of Health, the Horseman of Pestilence of combat level 75 as well as some rats of level 1 will appear. You will get extra unblockable damage except if you kill the rats. After you defeated him, take the Shard of Pestilence.
Horseman of Death[]
Go down to the 4th floor. Go to the center and dig west of the Cradle of Life, the Horseman of Death of combat level 75 will appear, it summons zombies, skeletons, ghosts and ankous from combat 22 to 86, these come out of a hole in the wall like the skeleton horde in Daemonheim. You must block the holes, else there are to much undead. Take the final Shard of Death,
Go outside the stronghold, and talk to Wallhelim's spirit, show him the four shards, he will ask you to repair the shards, you must use the shards on an anvil, note: you need an hammer in your inventory, or in the toolbelt! Then use an ball of wool, to create an amulet, from the shards. Return to Wallhelim, he will say that you need an good team, or else you won't make it angst the something...
Getting an team[]
Items needed: pickaxe, 5000 coins.


The Mercenaries and Trolls battling at the Mercenary Camp.
You need to talk to the Mercenary leader north of Falador now ask him to help, offer him 5,000 gp. He will laugh at you and say that they already have an mission, defending Falador against the trolls. Say that you can prevent the trolls for coming in trade for their help. He will accept only if you pay him 5k. Use any pickaxe on the hole where the trolls are coming out. The hole collapses. You will get 4,000 ![]() exp. Now the Mercenary leader will help you, he will be waiting at the fourth floor of the Stronghold of Security. Go back to Wallhelim's spirit and say him you got an team. He will say, that the amulet is the key to get to the Creature...
exp. Now the Mercenary leader will help you, he will be waiting at the fourth floor of the Stronghold of Security. Go back to Wallhelim's spirit and say him you got an team. He will say, that the amulet is the key to get to the Creature...
The final fight[]


The 5th floor of the Stronghold of Security.
Items needed: The amulet, a spade, a rope and your best fight gear and good food, to defeat Apocalypse an level 300 monster!


.png)
It's... Apocalypse!
Wear the amulet and dig now next to the Cradle of Life, and use a rope on it. You will enter an new floor, here you can use an altar to restore all you LP and prayer points before the battle starts. You see a locked door west of you. Enter the room in the north, A cutscene starts, an demon called Apocalypse will come, you have to fight him now. You will be helped by the 3 Mercenaries, all of combat 113. The Mercenaries will be focused at the Apocalypse, you need to fight off his minions, when the minions are death fight Apocalypse until he summon his minions again. Note: When one of the Mercenaries has low LP use food on him to prevent him dying!
Finishing of[]
Once you defeated Apocalypse he will drop random stuff and a key, use the key on the locked door and you will finally meet Litara’s brother, he will give you his sword and 100k, but the Mercenaries wants 75% of the money, so you get only 25k. You can also choice to open the chest, which contains random stuff, like noted rune essence. Note: The chest will give you better stuff in a members world. Talk to Litara or Elif for your reward.
Rewards[]
- 25,000 gp
- You can open the chest for random rewards
- 4,000
 experience (during the quest)
 - 4,000 experience (during the quest)
- 6 10,000 exp lamps, for combat skills OR 10,000 exp in Ranged, Magic, Attack, Strength, Defence and Constitution. Those lamps are for pures who don’t want experience in a skill. Note: you can only use one lamp on each combat skill!
- Elif's sword, one of the strongest weapons for free players.
- 4 quest points.
- Ability to fight Apocalypse again, you can use your own team now.
- Ability to get the Boots of Apocalypse, the upgraded version of fighting/fancy boots as drop from Apocalypse.
Litara's Quest | |
|---|---|
| NPCs |
|
| Enemies |
|
| Items |
Skeleton • Shard of War • Shard of Famine • Shard of Pestilence • Shard of Death • Repaired shard of War • Repaired shard of Famine • Repaired shard of Pestilence • Repaired shard of Death • Amulet (Litara's Quest) • Key (Litara's Quest) |
| Scenary |
Chest (Stronghold of Security) |
| Rewards |
Experience lamp • Elif's sword |
| Locations | |
| Related | |